You cannot upgrade an existing vSphere Agent to VRA 8.40. However, you can re-register VRA with a vault as a version 7.3x vSphere Agent, run backup jobs from the version 7.3x Agent without reseeding, and restore VMs from existing backups.
Note: The first backup after a re-registration will not reseed, but the backup could take longer than a normal delta backup. The VRA cannot use Changed Block Tracking (CBT) for the first backup, and has to read all VM data.
When you re-register a VRA as a version 7.3x vSphere Agent, the vCenter address and backup jobs are automatically populated for the VRA. You must then specify credentials for authenticating with the vCenter, credentials for sending email notifications, and the encryption password for each backup job.
IMPORTANT: To avoid reseeding a job, you must enter the encryption password that was used when vSphere Agent 7.3x ran the backup job.
To re-register a vSphere Recovery Agent as a vSphere Agent:
1. Capture all logs from the version 7.3x vSphere Agent in a Support bundle. To do this, run the following command on the vSphere Agent:
support logs scp [user@host[:path]]
Where path is a Windows share where the Support bundle will be saved, and user@host is a user with access to the Windows share.
2. Disable all scheduled jobs for the version 7.3x vSphere Agent. To do this, on the Computers page in Portal, select the check box to the left of the version 7.3x vSphere Agent. In the Actions list, click Disable Scheduled Jobs.
3. Install VRA on a Windows physical or virtual machine with local network access to the vCenter that you want to protect.
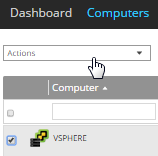
4. On the navigation bar in Portal, click Computers.
The Computers page shows registered computers.
5. Find the VRA that you installed, and expand its view by clicking its row.
The Configure Automatically and Configure Manually boxes appear.
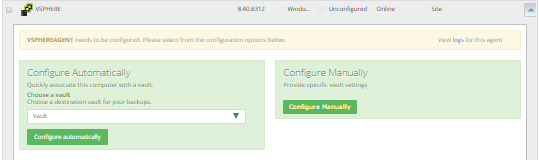
6. Click Configure Manually.
7. On the Vault Settings tab, click Re-register.

8. In the Vault Settings dialog box, do one of the following:
•In the Vault Profile list, select the vault with backups from the original vSphere Agent. Vault information and credentials are then populated in the dialog box.
•In the Vault Name box, enter a name for the vault. In the Address box, enter the host name or IP address of the vault with backups from the original vSphere Agent. In the Account, Username, and Password boxes, enter an account and credentials for backing up data to and restoring data from the vault.
Specifying the host name of the vault is recommended. This will allow DNS to handle IP address changes.
9. Click Load Computers.
10. In the list of computers, click the name of the version 7.3x vSphere Agent that previously backed up VMs in the vCenter. Click Save.
11. In the Confirmation message box, click Yes.
12. On the vCenter Settings tab, type the username and password for authenticating with the vCenter.
13. Confirm that the Changed Block Tracking (CBT) setting is correct.
14. Click Save. A Success message appears. Click Okay.
15. On the Advanced tab, if a Notifications tab appears and you can edit SMTP settings, enter and save SMTP credentials. Click Save.
16. On the Jobs tab, do the following for each backup job:
a. In the Select Action menu for the job, click Edit Job.
b. In the Edit Job dialog box, re-enter the encryption password for the job in the Password and Confirm Password boxes.
IMPORTANT: To avoid reseeding the job, you must enter the encryption password that was used when the version 7.3x vSphere Agent ran the backup job.
c. Save the job.
d. In the Select Action menu for the job, click Synchronize.