You can restore one or more virtual machines (VMs) from a Hyper-V backup. In a single request, you can restore VMs that were backed up using multiple Hyper-V backup jobs, even if each job has a different encryption password. You can restore a protected VM even if the original VM no longer exists in the Hyper-V environment and its backup job no longer exists.
Restored VMs are imported automatically into Hyper-V. Restored VMs keep their original names, unless you specify new VM names during the restore process.
If you restore VMs from a Windows 2012 environment to a Windows 2012 R2 environment, the restored VMs are restored as Generation 1 VMs. You cannot restore VMs from a Windows 2012 R2 environment to a Windows 2012 environment.
Each VM has a unique identifier. You can restore a VM with its original internal identification number (GUID), with a new GUID, or with a new GUID if a VM with the original GUID exists in the Hyper-V environment.
Note: A restored Hyper-V VM never overwrites an existing VM.
When restoring a VM, you must specify a destination for the VM files. If you are restoring to a Hyper-V cluster, available destinations are Cluster Shared Volumes (CSV) found in the Failover Cluster Manager. If you are restoring to a standalone host, available destinations are volumes on direct attached storage. You can also specify a datastore folder for the files. If you do not specify a folder, a new folder with the same name as the VM is created for the VM files. All of a VM’s disks are restored in a single location, even if the disks originally resided on different volumes and you select the original host and datastore.
Hyper-V VM files will not be restored to a non-empty folder. If a folder exists, it will create a new folder. If you force a custom folder, and this folder exists, the restore of that specific VM will fail.
If you stop a restore process, VMs that are restored before you stop the process remain in the Hyper-V environment. VMs that are not fully restored when you stop the process are not restored.
You can only restore a Hyper-V VM to a host where the Host service is installed. When restoring a Hyper-V VM in a cluster, you must choose a host where the Host service is running or the restore will fail. If the Host service is not installed on the node where you want to restore a VM, you can restore the VM to a node that has the Host service, and then migrate the VM to another node in the cluster.
Note: Portal does not indicate which nodes in a cluster have the Host service installed. All hosts in a Hyper-V cluster appear on the Hosts tab on the Computer page, even if the Host service is only installed on some of the hosts.
In the event of a disaster, a QSM vault can be used to provide local vault access for restoring VMs that are backed up to an offsite vault.
To restore Hyper-V VMs:
1. On the navigation bar, click Computers.
A grid lists available computers.
2. Find the Hyper-V environment with the VM that you want to restore, and expand the environment view by clicking the row.
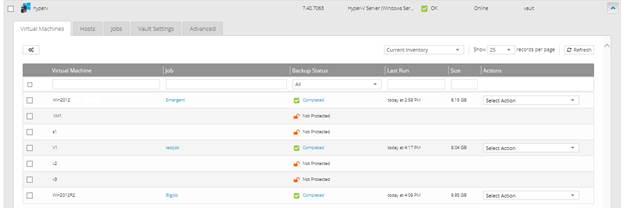
3. Click the Virtual Machines tab.
The Virtual Machines tab shows all VMs in the Hyper-V environment.
4. In the Current Inventory/Protected Inventory filter, click Protected Inventory.
The Virtual Machines tab shows VMs that have been backed up and can be restored.
5. Do one of the following:
•To restore one VM, click Restore in its Select Action menu.
•To restore multiple VMs, select the check box for each VM that you want
to restore. Click Restore Hyper-V Job. 
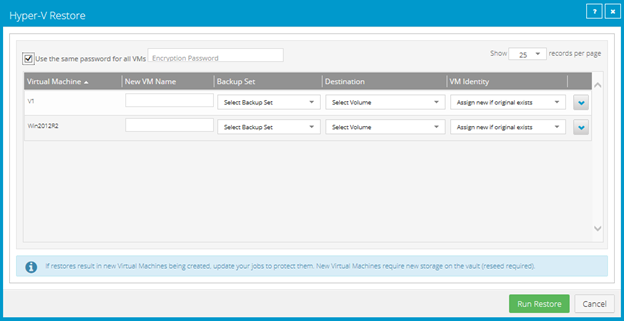
The Hyper-V Restore dialog box shows the VM or VMs that you want to restore.
6. Do one of the following:
•If you are restoring one VM, enter the data encryption password in the Encryption Password box.
•If you are restoring multiple VMs protected with the same encryption password, select the Use the same password for all VMs check box. In the Encryption Password box, enter the data encryption password.
To view a password hint, click the Hint button.

•If you are restoring multiple VMs that were protected by jobs with different encryption passwords, clear the Use the same password for all VMs check box.
7. For each VM that you are restoring, do the following in the VM row:
•(Optional) In the New VM Name box, enter a name for the restored VM. If you do not enter a name, the VM is restored with its original name.
•In the Backup Set list, click the backup from which you want to restore. If you did not enter the same password for all VMs, enter the password in the Encryption Password box. Click Apply.
•In the Destination list, click the destination for the VM files. If you want to specify a folder for restoring the VM files, enter the folder in the Sub-Path box. Click Apply.
You can enter subfolders in the Sub-Path box (e.g., folder\subfolder1\subfolder2).
In a Hyper-V cluster, you can restore files to a CSV. In a standalone host, you can restore files to volumes on direct attached storage.
You cannot restore VMs to system volumes. System volumes do not appear in the Destination list.
If you do not specify a folder, the VM is restored to a folder with the VM name.
Note: Hyper-V VM files will not be restored to a non-empty folder. If a folder exists, it will create a new folder with the same name followed by a number in brackets ().
•In the VM Identity list, do one of the following:
•To restore the VM with a new GUID, click Assign new identity.
•To restore the VM with its original GUID, click Restore original identity.
Note: If a VM with the original GUID exists in the Hyper-V environment, the restored VM will not overwrite the existing VM. Two VMs in a Hyper-V environment can have the same GUID if they are on separate hosts and are not configured for high availability.
•To restore the VM with its original GUID unless a VM with the original GUID exists in the Hyper-V environment, click Assign new if original exists. If a VM with the original GUID exists in the Hyper-V environment, the VM is restored with a new GUID.
•Click the VM row to expand its view. Do one or more of the following:
•To specify a host for the restored VM, click a host in the Host list.
•To power on the VM after it is restored, select Power on VM.
•To leave the restored VM powered off, clear Power on VM.
•To connect the restored VM to the network, select Enable network connectivity.
If Enable network connectivity is selected, and the VM has a network adapter with the same name as a network adapter on the host, the VM will be automatically connected to the network.
•To restore the VM without network connectivity, clear Enable network connectivity.
8. Click Run Restore.