After backing up volumes from a Windows server using the Image Plug-in, you can restore individual files and folders from the backup.
To restore files and folders from an Image backup, you mount volumes from a safeset as drives on the computer where you want to restore files and folders. You can then browse the drives using Windows Explorer, and copy files and folders that you want to restore.
Note: To restore files and folders from Image backups, Agent services must be running using the local system account.
Note: When SQL Server databases are backed up using Image Plug-in version 7.5 or later, you can also restore database files, tables and objects from the application-consistent backups.
To restore files and folders from an Image backup:
1. On the navigation bar, click Computers.
A grid lists available computers.
2. Find the Windows computer with the Image Plug-in, and expand its view by clicking the computer row.
3. Click the Jobs tab.
4. Find the Image backup job with files and folders to restore, and click Restore in the job’s Select Action menu.
Note: You can restore files and folders from any Image Plug-in job.
5. In the Image Restore dialog box, select Individual File or Folders, and then click Next - Configure Source.
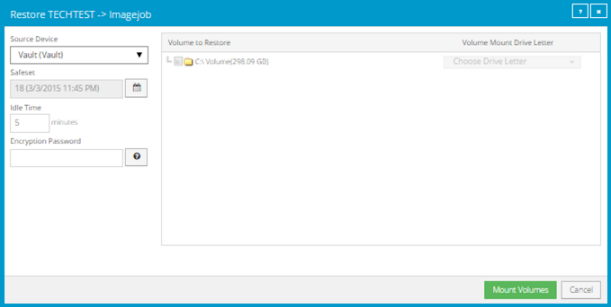
The Restore dialog box shows volumes that you can mount as drives. The most recent safeset for the job appears in the Safeset box.
6. To restore data
from an older safeset, click the calendar button.  In the calendar that appears, click the
date of the safeset from which you want to restore. To the right of the
calendar, click the specific safeset that you want to use.
In the calendar that appears, click the
date of the safeset from which you want to restore. To the right of the
calendar, click the specific safeset that you want to use.
8. In the
Encryption Password box, enter the encryption password. To view the
password hint, click the Hint button. 
9. In the Volume to Restore column, select each backed-up volume from which you want to restore files and folders.
10. In the Volume Mount Drive Letter column, choose the drive letter for mounting each volume.
11. Click Mount Volumes.
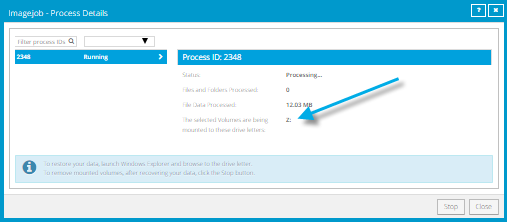
12. If a confirmation message appears, read the message, and then click Continue.
The Process Details dialog box appears. When each volume is mounted, the drive letter is shown at the right side of the dialog box.
13. Use Windows Explorer to navigate to the drive or drives and copy files and folders that you want to restore.
14. When you are done restoring files and folders, click Stop to remove the mounted drives.
If you do not click Stop, the drive will be unmounted automatically after the number of minutes of inactivity specified in the Idle Time box. See Step 7.