You can restore virtual disks (VMDKs) from a vSphere backup. The restore process requires 1 GB of free space in addition to the size of the VMDK being restored.
Note: You cannot restore VMDKs using the vSphere Recovery Agent. Instead, you can restore entire VMs or specific files and folders. See Restore vSphere VMs or Restore files and folders using a vSphere Recovery Agent.
To restore vSphere VMDKs:
1. On the navigation bar, click Computers.
A grid lists available computers.
2. Find the vSphere environment with the VMDK that you want to restore, and expand its view by clicking the row.
3. Click the Jobs tab.
4. Find the backup job with the VMDKs that you want to restore, and click Restore in the job’s Select Action menu.
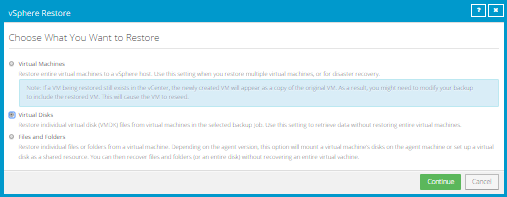
5. In the Choose What You Want to Restore dialog box, select Virtual Disks.
Note: If the Virtual Disks option does not appear, this option is not supported by the installed Agent version. Instead, you can restore entire VMs or specific files and folders. See Restore vSphere VMs or Restore files and folders using a vSphere Recovery Agent.
6. Click Continue.
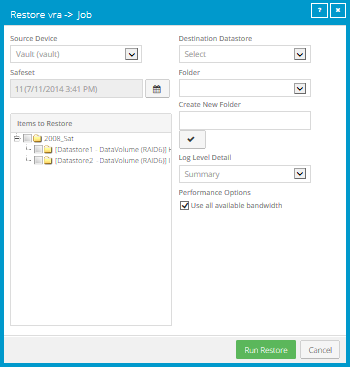
The Restore dialog box shows the most recent safeset for the job.
7. To restore data from another source, click a source (usually a vault) in the Source Device list.
8. To restore from
an older safeset, click the Browse Safesets button.  In the calendar that appears, click the
date of the safeset from which you want to restore. To the right of the
calendar, click the specific safeset from which you want to restore.
In the calendar that appears, click the
date of the safeset from which you want to restore. To the right of the
calendar, click the specific safeset from which you want to restore.
9. In the Items to Restore box, select the check box for each VMDK that you want to restore.
10. In the Encryption
Password box, enter the data encryption password. To view the password hint,
click the Hint button. 
11. In the Destination Datastore list, click the datastore where you want to restore the selected VMDKs.
12. Do one of the following to specify a location for restoring the VMDK:
•To restore the VMDKs to an existing folder, click the folder in the Folder list.
Note: Folder names only appear in the Folder list after you select a destination datastore.
•To restore the VMDKs to a new folder, enter a folder name in the
Create New Folder box, and click the Create Folder button. 
13. In the Log Level Detail list, click the logging level. See Advanced restore options.
14. To use all available bandwidth for the restore, select Use all available bandwidth.
15. Click Run Restore.