Two types of users can access all sites in Portal, and are not associated with a specific site:
•Super users. Super users can add and manage sites and users in Portal. However, Super users cannot add or manage computers, create or run backup jobs, or run restores. Super users can only view pages in Portal that are used for managing sites and users.
•Support users. Support users can view information and reports for all sites in Portal. However, Super users cannot add or manage computers, create or run backup jobs, or run restores.
For more information on user types, see Create and manage users.
Super users can create other Super users and Support users in Portal.
Note: In some Portal instances, users are authenticated using an external identity server (e.g., Active Directory Federation Services). In these cases, Portal users are created automatically after a user signs in. For more information, see Users with single sign-on credentials.
To create a Super user or Support user:
1. When signed in as a Super user, click Users on the navigation bar.
2. Click Create New User.
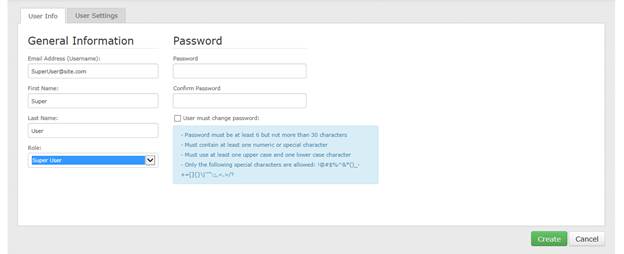
3. On the User Info tab, in the Email Address (Username) box, type the user’s email address.
The user will sign in to Portal using this email address.
4. In the First Name box, type the user’s given name.
5. In the Last Name box, type the user’s surname.
6. In the Role list, click the type of user you want to create: Super User or Support User
When you are creating a Super user or Support user, only the User Info and User Settings tabs appear. Other tabs do not apply to these user types.
7. In the Password and Confirm Password fields, type the user’s password for signing in to Portal.
8. To require the user to change his or her password after the first sign-in, select the User must change password check box.
9. Click Create.