Admin users and Support users can schedule reports to be emailed in comma-separated values (.csv), Microsoft Excel (.xls) or Adobe Acrobat (.pdf) format. A report file (named Report.csv, Report.xls or Report.pdf) is sent as an email attachment to one or more specified recipients on the specified days at the specified time.
Note: The Daily Status Report can only be emailed in .csv format. See Schedule the Daily Status Report.
Reports in Microsoft Excel (.xls) and Adobe Acrobat (.pdf) format are formatted using the site’s logo, color, and custom text. See Customize the Portal appearance for a site.
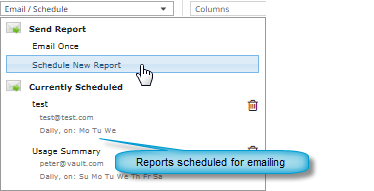
Scheduled reports appear in the Email/Schedule list on the Reports page.
To schedule an emailed report:
1. View a report. Specify a date range, and data columns and records to show in the report. See View a report.
2. Click the Email/Schedule box. In the Send Report list that appears, click Schedule New Report.
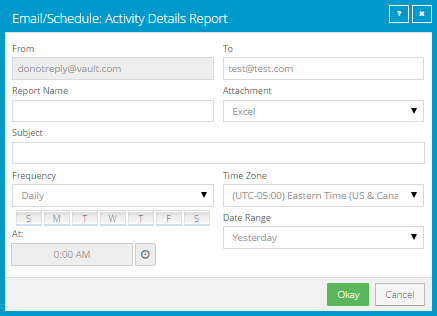
3. In the Email/Schedule dialog box, do the following:
•In the To box, type one or more email addresses for sending the report. Use commas to separate multiple email addresses.
•In the Report Name box, type a name for the scheduled report. This name appears in the Email/Schedule list.
•In the Subject box, type a subject for the email.
•In the Attachment list, click one of the following formats for the emailed report data file:
•CSV (comma-separated values)
•Excel (Microsoft Excel)
•PDF (Adobe Acrobat)
•In the Date Range list, click the date range for the emailed report:
•Yesterday
•Last 24 Hours
•Last 7 Days
•Last 30 Days
4. Do one of the following:
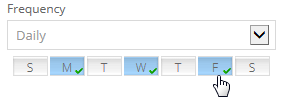
•To email the report on specific days each week, in the Frequency list, click Daily. In the day row, select the days when you want to email the report each week.
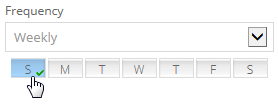
•To email the report once each week, in the Frequency list, click Weekly. In the day row, select the day when you want to email the report each week.
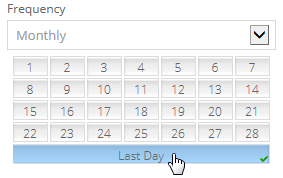
•To email the report once each month, in the Frequency list, click Monthly. In the calendar, select the date when you want to email the report each month, or select Last Day to email the report on the last day of each month.
5. Using the At field, specify the time when you want to email the report on the specified days.
6. Click Okay.