If a Hyper-V Agent goes offline because it is lost or unavailable, you can install a new Management service and recover jobs and settings from the offline Agent. You can then enter credentials, run backup jobs from the original Agent, and restore VMs that were protected by the Agent.
You can recover the following information and settings from an offline Hyper-V Agent:
•Backup jobs
•Vault settings
•Hyper-V environment address and last backup status
•Advanced settings, including the Agent description, retention types, notifications, and bandwidth throttling
You cannot recover passwords for a Hyper-V Agent. You must manually enter Hyper-V environment, vault, and encryption passwords after recovering Hyper-V Agent jobs and settings. You might also need to enter an SMTP password for notifications.
You can recover jobs and settings from an earlier Hyper-V Agent version, or the current version. Recovering jobs from a previous Agent version can be useful when migrating Hyper-V VMs to a new environment. See Upgrade the Hyper-V Agent.
If you recover jobs and settings from an offline Hyper-V Agent in a Windows 2012 environment, and then restore VMs to a Windows 2012 R2 environment, the restored VMs are restored as Generation 1 VMs. You cannot restore VMs from a Windows 2012 R2 environment to a Windows 2012 environment.
When you recover jobs and settings from an offline Hyper-V Agent, all scheduled backup jobs for the Agent are disabled. If Hyper-V VMs remain in the protected environment, or have been restored after a disaster, you can re-enable all scheduled jobs for the environment. See Disable or enable all scheduled backup jobs.
IMPORTANT: Hyper-V Agent settings are saved in the Portal database. To ensure that a Hyper-V environment can be fully restored if the Portal is also lost, the Portal database must be backed up. For more information, see the Portal Installation and Configuration Guide.
To recover jobs and settings from an offline Hyper-V Agent:
1. Install the Hyper-V Agent Management service on a supported Windows server. On the Register Hyper-V Agent Management with Portal page of the installer, register the Management service to the Portal where the original Hyper-V Agent was registered. Register the Management service to the Portal using the user who installed the original Hyper-V Agent, or using an Admin user in the original user’s site. See Install the Hyper-V Agent Management service.
2. Log in to Portal as the user who installed the original Hyper-V Agent, or as an Admin user in the original user’s site.
3. In Portal, on the navigation bar, click Computers.
The Computers page shows registered computers.
4. Find the computer where the new Hyper-V Agent Management service is installed, and expand its view by clicking its row.
Before you recover jobs and settings from the offline Hyper-V agent, the name of the computer where the Management service is installed appears on the Computers page.
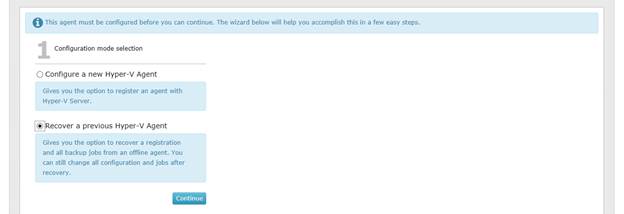
The Configuration mode selection section appears.
Note: The Recover a previous Hyper-V Agent option only appears if there is an offline Hyper-V Agent in the user’s site.
5. Select Recover a previous Hyper-V Agent, and then click Continue.
The Recover section appears. The Select an offline agent to recover from list shows the names of protected Hyper-V environments where the Management service is offline, and shows the last date and time when the Management service connected to Portal.
Note: The date and time shown in the Select an offline agent to recover from list could reflect the date and time when the Management service was installed or the server was restarted. The date and time in this list does not reflect the date and time of the last backup.
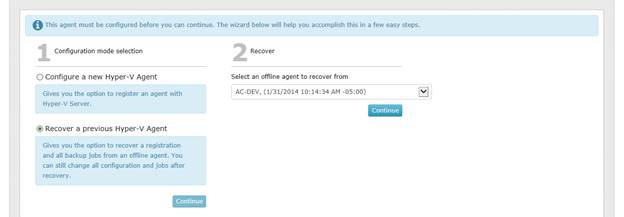
6. From the Select an offline agent to recover from list, choose the Hyper-V Agent from which you want to recover jobs and settings. If you are sure that this is the correct offline Agent, click Continue.
Note: Do not click Continue unless the correct offline Agent is selected. The offline Agent’s settings and jobs are downloaded immediately after you click Continue.
The system downloads the offline Hyper-V Agent’s jobs and settings. On the Computers page, the computer name changes to the name of the protected Hyper-V cluster or standalone host.
The Success section lists the passwords that you need to enter: Hyper-V environment, vault registrations, job encryption, and Email notifications.
7. Click OK.
8. On the Cluster Credentials tab, do one of the following:
•To continue protecting the same Hyper-V environment, enter the password for the specified user.
•To provide credentials for a new Hyper-V environment so you can restore VMs to the new environment, enter Hyper-V environment information in the Address and Domain boxes. In the Username box, type the domain administrator account that is used to authenticate with the Hyper-V cluster or standalone host. In the Password box, type the password for the specified user. For more information, see Change credentials or the network address for accessing Hyper-V.
To determine whether the credentials are valid, click Verify Information. If the credentials are valid, click Okay in the confirmation message box.
9. Click Save. In the confirmation message box, click Okay.
10. On the Vault Settings tab, enter the password for each vault connection. See Add vault settings.
11. On the Jobs tab, edit each job, enter its encryption password, and click Save. In the confirmation message box, click Continue. See Edit a Hyper-V backup job.
12. If required, on the Advanced tab, on the Notifications tab, enter the SMTP password. See Set up email notifications for a computer.
13. Click Save. In the confirmation message box, click Okay.
14. If the Hyper-V Agent Management service now has a new IP address, check whether Agent Host services are communicating with the Management service. If not, reinstall the Host service on each Hyper-V cluster host or standalone node. See Install the Hyper-V Agent Host service.
15. If the protected Hyper-V VMs exist in the environment (i.e., the VMs were restored after a disaster or remained intact when the Hyper-V Agent was lost), you can re-enable all scheduled backup jobs for the Hyper-V environment. See Disable or enable all scheduled backup jobs.